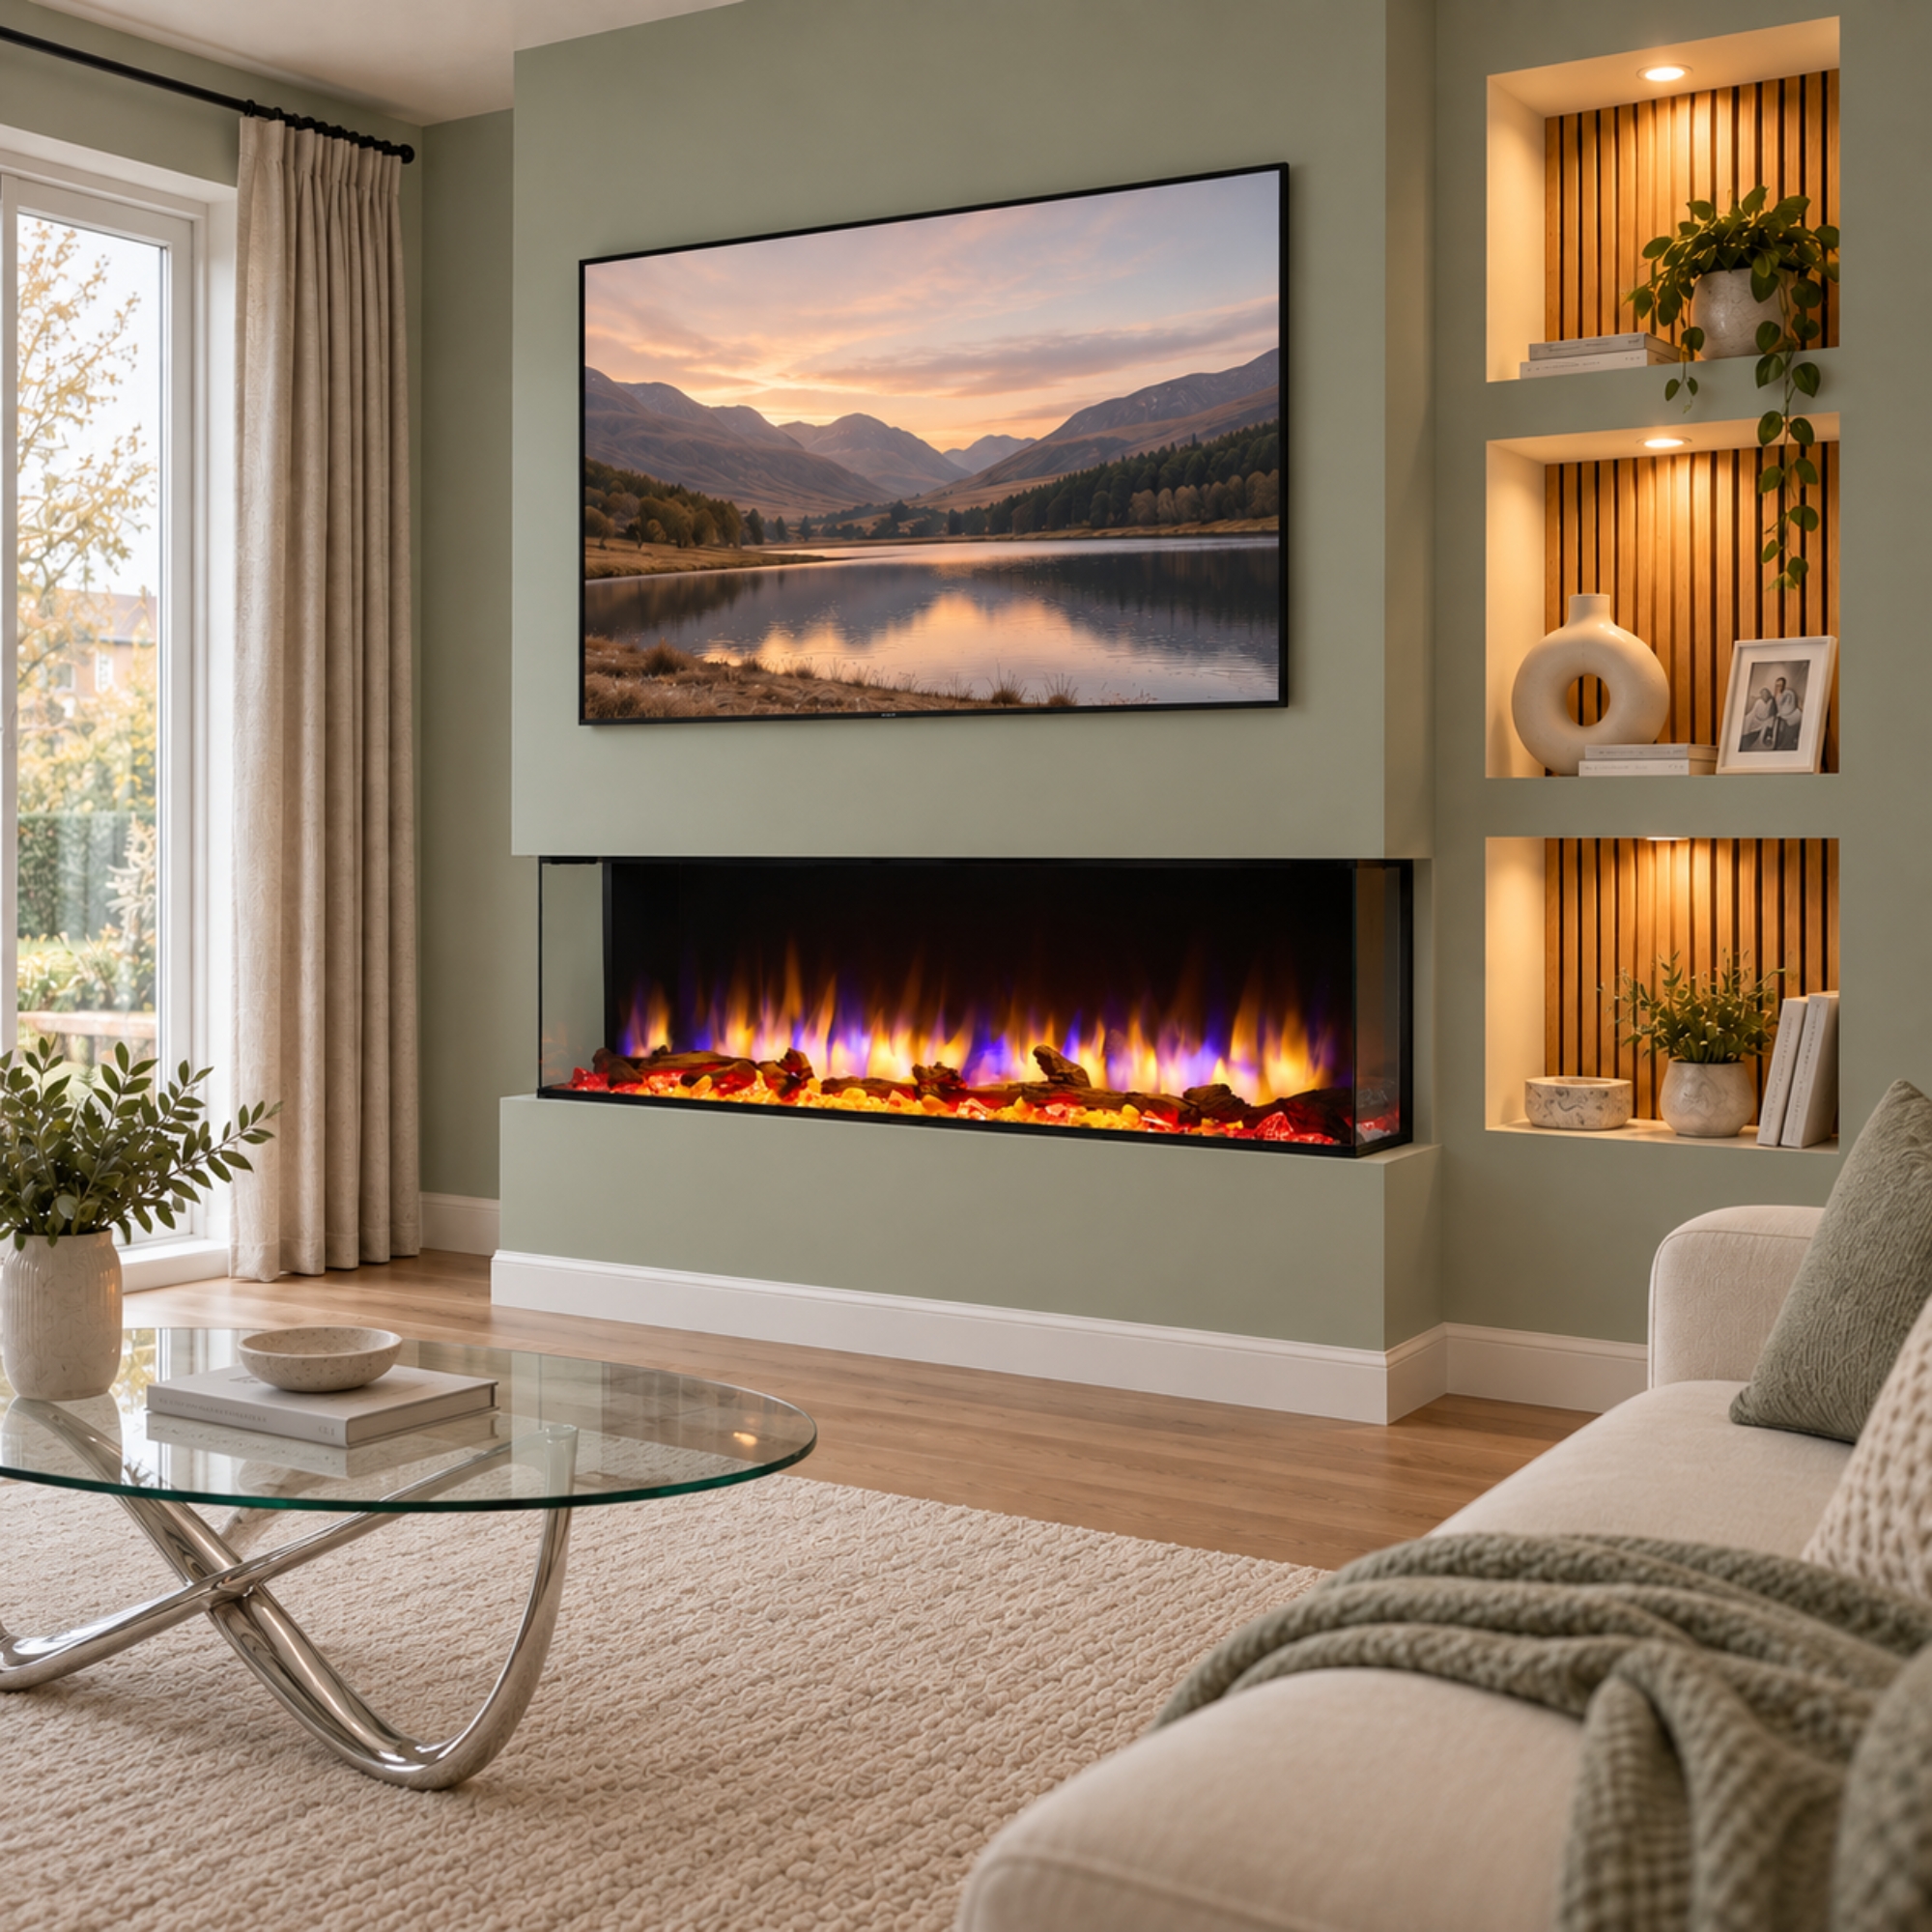
Choose a 1-sided electric fire for a front-facing focal point, a 2-sided electric fire when you want the display to wrap around one corner, or a 3-sided electric fire when both ends of the fire will be visible. The right choice depends on your seating positions, the shape of your media wall and the finish you want.
More visible sides do not automatically mean more heat or a better fit. Start with how you use the room, then check the installation requirements for your chosen model.
1-sided, 2-sided and 3-sided electric fires at a glance
| Layout | Visible faces | When to consider it | What to plan |
|---|---|---|---|
| 1-sided | Front only | A sofa facing the fire, or a feature framed by cabinetry | The opening, front finish and access |
| 2-sided | Front and one end | An exposed left or right corner viewed from two directions | Which end stays visible and how the wall finishes around it |
| 3-sided | Front and both ends | A projecting feature with seating or sightlines on either side | Space around both ends, wall projection and surrounding furniture |
What is a 1-sided electric fire?
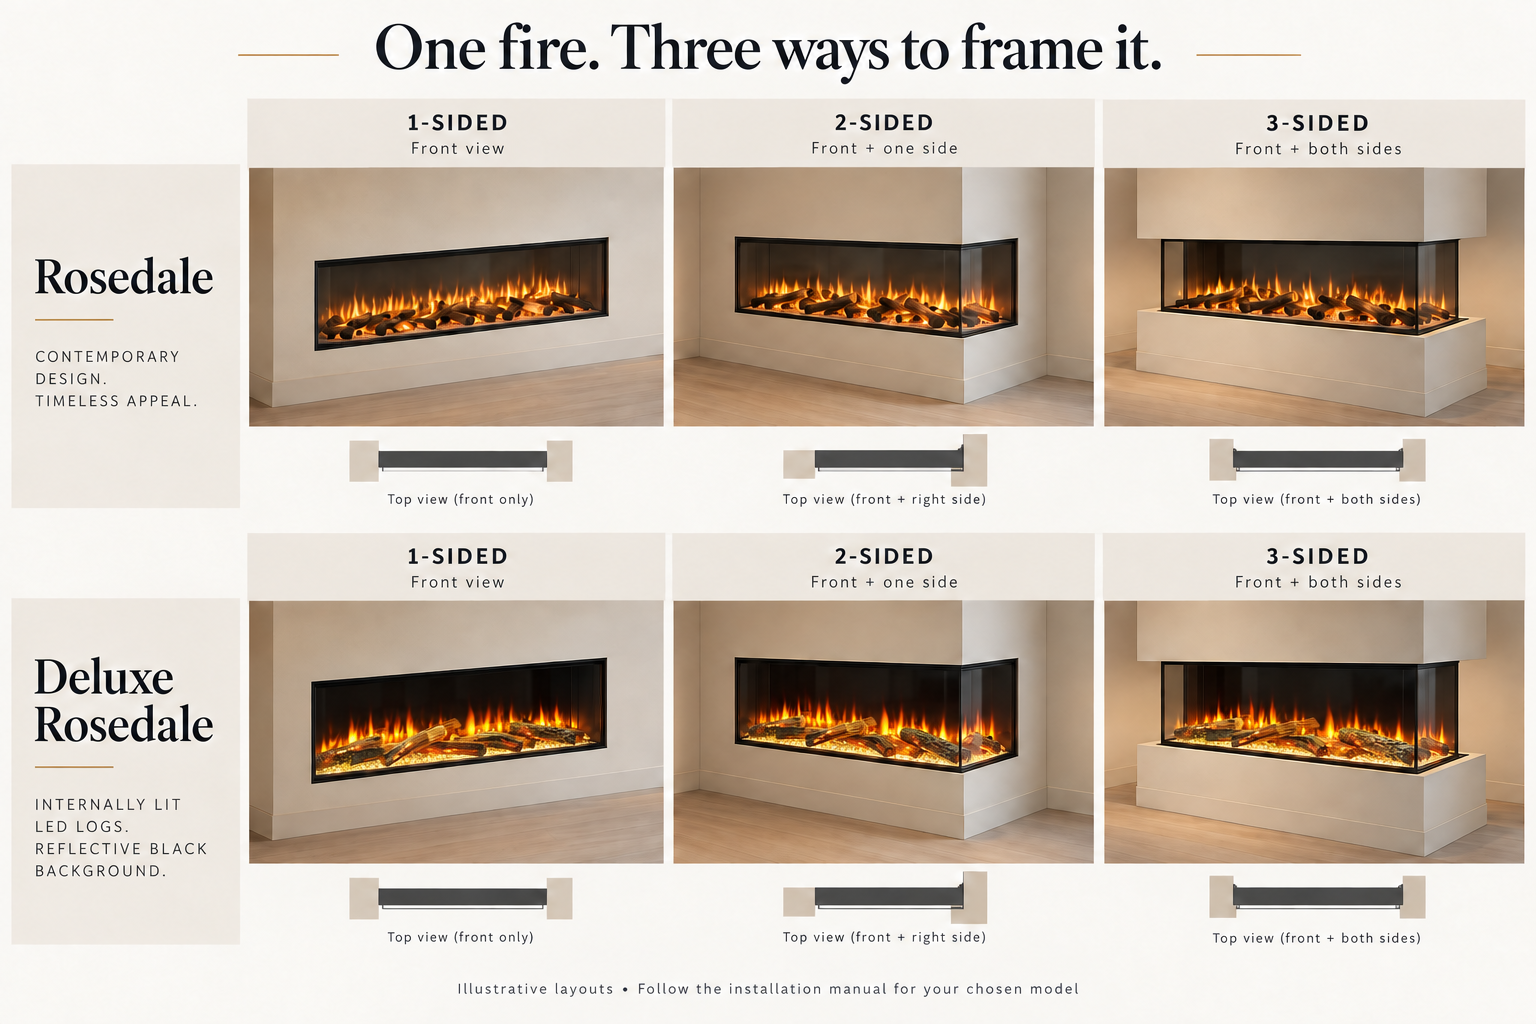
A 1-sided installation shows the fire from the front, with the ends concealed within the surrounding construction. It creates a clearly framed display that can work well beneath a television or between built-in cupboards.
Consider this layout if your main sofa faces the wall and there is little opportunity to see the fire from the sides. It can also suit a room where you want the fireplace to sit quietly within a larger arrangement of shelving and storage.
Example: in a lounge with a sofa opposite the TV and cabinets on both sides of the media wall, a front-facing fire keeps the layout simple. Side glass would add little if the cabinetry hid it from view.
A front-only layout is not automatically shallower. If the same configurable fire is used in all three arrangements, its appliance depth remains the same. Compare the actual model and installation dimensions.
What is a 2-sided electric fire?
A 2-sided installation exposes the front and one end of the fire. This creates a corner view, letting the display continue around the left or right edge of the feature.
It can be a good option when one side of a media wall faces an open part of the room, while the other meets storage or another wall. Decide which end should be visible by looking from your usual seats and the main entrance.
Example: if a sofa faces the TV and an armchair sits to the left, an exposed left-hand end may make the fire easier to enjoy from both positions. Check the exact model supports the arrangement before designing the enclosure.
A corner-view installation does not necessarily mean placing the whole media wall diagonally across a room corner. It describes the visible faces of the fire.
What is a 3-sided electric fire?
A 3-sided installation exposes the front and both ends of the fire. It suits a projecting media wall or chimney-breast-style feature where the side views remain open.
This can work particularly well with an L-shaped seating arrangement or an open-plan room where people approach the feature from different directions. The benefit is the additional view of the flame and fuel-bed display.
Example: a central media wall with a sofa opposite and chairs to either side gives both exposed ends a purpose. Place tall furniture carefully so it does not hide the views you are paying to create.
A 3-sided fire is not a see-through, double-fronted fire. Do not assume you can view it from the back or use it between two rooms unless the appliance is specifically designed for that installation.
How to choose the right layout for your room
1. Check your everyday viewing positions
Sit on the sofa and chairs before choosing. Look at the proposed fire position from each seat. If almost every view is straight ahead, a front-only layout may provide everything you need. If one or both ends are clearly visible, a corner or panoramic arrangement may add more.
2. Plan the wall and surrounding storage together
Sketch the fire, TV, cupboards and shelves as one arrangement. A three-sided display needs a wall design that exposes both ends; cabinetry immediately beside it may defeat that purpose. Mark the proposed wall projection on the floor to check walking space.
3. Choose the fire size separately
The number of visible sides does not determine the right width. Compare the fire with your TV, wall and furniture, then check exact measurements. Our guide to choosing the right electric fire size for a media wall explains how to judge the proportions.
4. Confirm the installation before construction
Choose the exact model, size and viewing arrangement before building. Use its current installation manual for the recess, support, finishing details, clearances and airflow. Appliance dimensions alone are not a construction opening specification.
If a TV will sit above the fire, follow both manufacturers’ instructions. Keep heater outlets clear and plan power, cables and maintenance access. Use a qualified electrician for electrical alterations. Our media wall building guide provides an overview of the planning stages.
How to change Rosedale and Deluxe Rosedale from 1-sided to 2-sided or 3-sided
Rosedale and Deluxe Rosedale use the same side-cover and edging-strip method to select the viewing layout. This is a physical installation choice, not a setting on the remote. The steps below explain the arrangement shown under “Choose Aspect Type” on printed page 7 of the Rosedale E150R–E153R instruction manual. Use the manual supplied with your exact model for its full installation requirements.
Before starting: switch the fire off, disconnect it from the power supply and let it cool. Configure the viewing sides before enclosing the appliance in the media wall. Have a screwdriver ready and keep the removed screws and panels together.
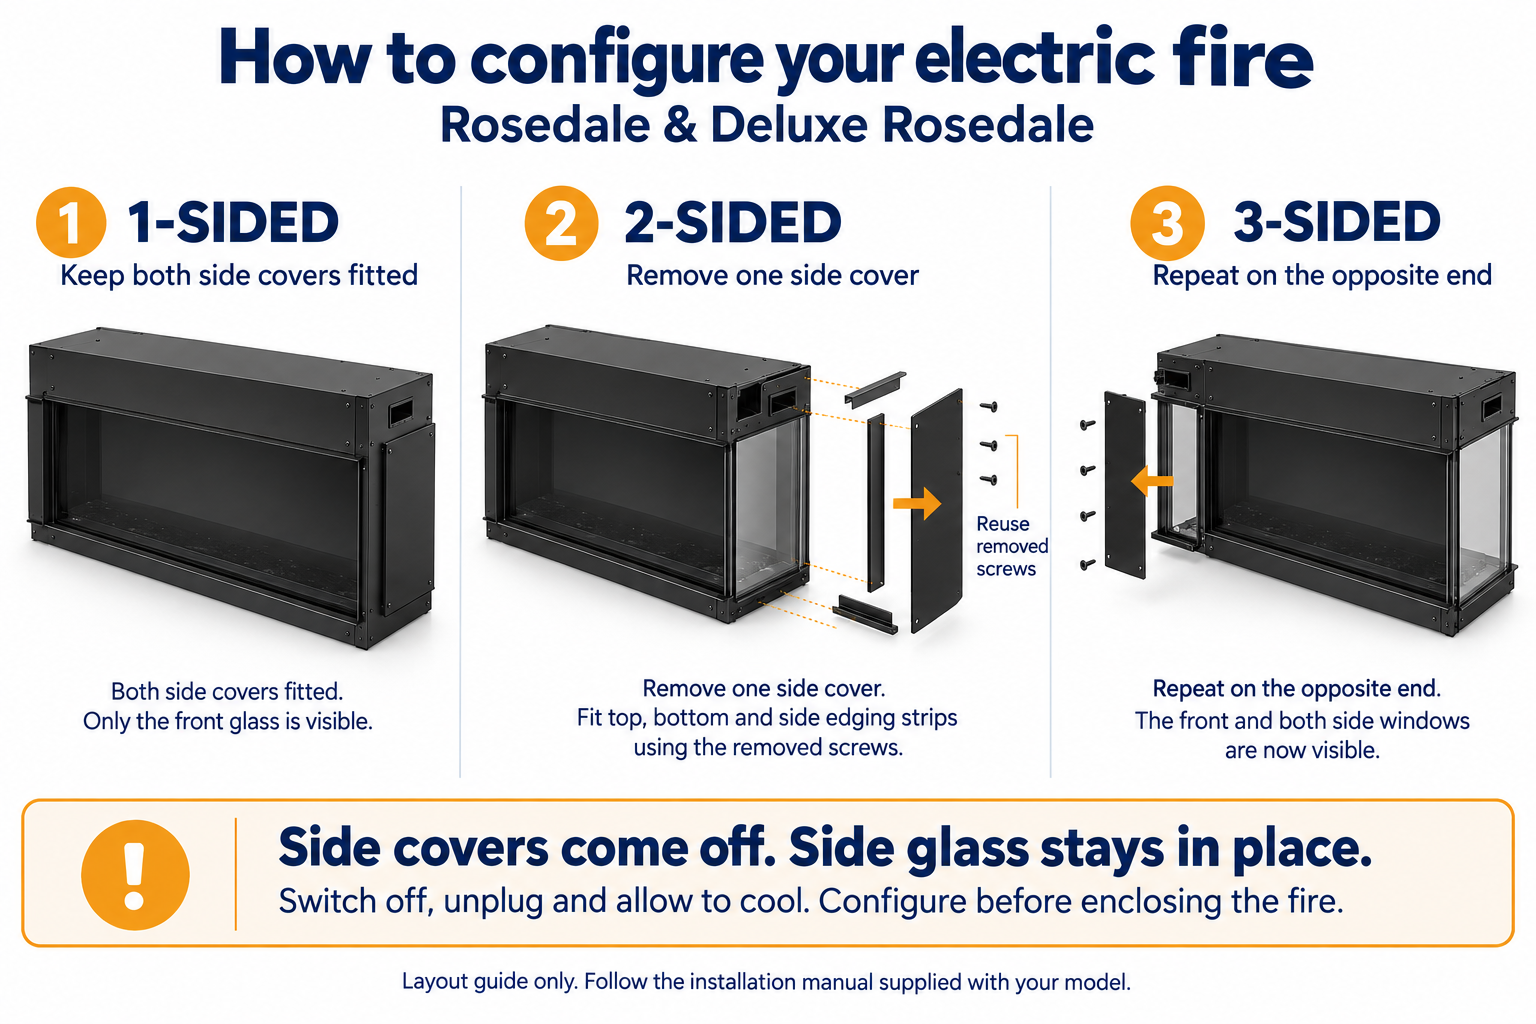
1-sided: keep both side panels fitted
The Rosedale manual describes the fire as supplied with its side panels already fitted. Leave both covers in position for a front-only installation: the front window is visible and both side windows are concealed.
2-sided: expose your chosen left or right end
- Choose the end you want to leave visible in the finished wall.
- Remove the side panel and side edging strip from that end, retaining the screws.
- Fit the top and bottom edging strips and the side edging strip to the appliance, using the screws removed with the side panel, as shown in the manual.
- Keep the opposite side panel fitted. You now have a front view plus one visible side window.
3-sided: repeat on the opposite end
Follow the same corner-aspect procedure on the other end: remove its side panel and side edging strip, then fit the top, bottom and side edging strips using the retained screws. Both side windows and the front window are now visible.
The side glass stays in place. The aspect-selection procedure removes the opaque side covers and rearranges the edging strips; it does not instruct you to remove the side glass. Front-glass removal is a separate procedure in the manual and should not be confused with selecting the viewing sides.
Can you change it after installation?
The fire supports these arrangements, but a finished media wall may hide the covers, screws and side windows. Changing the layout later can therefore require alterations to the surrounding construction. Ask your installer to assess access and finishing before starting, and keep the original panels and fixings if you may want a different arrangement later.
The shared layout method does not make the two products identical: Deluxe Rosedale has internally lit LED logs. Follow its own instructions for the fuel bed and electrical connections, and use each model’s specified installation dimensions.
Which Endeavour fires offer these layouts?
The Rosedale Media Wall Electric Fire supports one-, two- and three-sided installations. It offers a choice of widths, remote control and a flame display that can be used without the heater.
The Deluxe Rosedale also supports front-only, corner and three-sided layouts. Its additional features include Wi-Fi control, illuminated resin logs and optional crackling sound.
Compare the viewing arrangement first, then the features you will use. See our media wall electric fire comparison for a broader look at the range.
Frequently asked questions
Is a 3-sided electric fire better than a 2-sided fire?
It depends on the room. Three visible faces make sense when both ends can be enjoyed. Two may be a better match when only one end is exposed. Neither arrangement is automatically better for every home.
Can a 3-sided electric fire be installed with just the front showing?
Some models, including Rosedale and Deluxe Rosedale, support this. Check the supplied fitting options and manual; do not assume every three-sided appliance can be enclosed in the same way.
Does a 3-sided fire produce more heat?
The number of visible faces is not a heat-output rating. Compare the stated heater output and controls for each model. Changing the viewing arrangement of the same configurable appliance does not increase its rated output.
Can I change the layout after the media wall is built?
It may require rebuilding the surrounding wall and changing the finishing details. Confirm what the appliance permits and discuss the work with your installer. Choose your preferred arrangement before construction wherever possible.
Find the right fire for your media wall
Start with the views you want to enjoy: front only, front plus one end, or front plus both ends. Then compare sizes and installation requirements within that layout.
Explore our media wall electric fires, or contact Endeavour Fires with your wall measurements and a sketch of your room for help choosing a suitable model.